Guide
How to Configure Cloudflare DNS
A practical Cloudflare DNS setup guide covering record creation, proxy mode, TTL choices, and the checks that prevent common rollout mistakes.

A practical Cloudflare DNS setup guide covering record creation, proxy mode, TTL choices, and the checks that prevent common rollout mistakes.
This guide is for developers using Cloudflare DNS for a site, docs property, preview environment, or app subdomain and wanting a repeatable setup instead of dashboard guesswork.
The Cloudflare-specific mistake we see most often is simple: the record name is correct, but the orange-cloud decision was made by instinct instead of by contract. Cloudflare can answer DNS and it can proxy HTTP traffic, but those are not the same thing.
Pre-change checklist
Before touching the dashboard, confirm:
- the hostname you are about to change
- whether the destination is an IP or a platform hostname
- whether the destination expects Cloudflare proxying or direct DNS
- whether HTTPS and host binding are ready on the destination side
This keeps you from treating the orange cloud as a guess button.
Who this is for
Use this workflow if you are creating or changing a record in Cloudflare for:
- a product hostname such as
app.example.com - a documentation hostname such as
docs.example.com - an API or status hostname
- a preview or staging hostname that still needs a clean public URL
If you already know whether the destination wants a direct DNS answer or Cloudflare in front of it, the rest gets much easier.
The question to answer before opening the dashboard
Write these three facts down first:
- the hostname you are creating
- whether the destination is an IP or another hostname
- whether the destination should be proxied or DNS only
That third decision matters more than first-time Cloudflare users expect.
1. Create the record type that matches the destination
Typical cases:
- A record for a fixed origin IP
- CNAME for a provider hostname
Example:
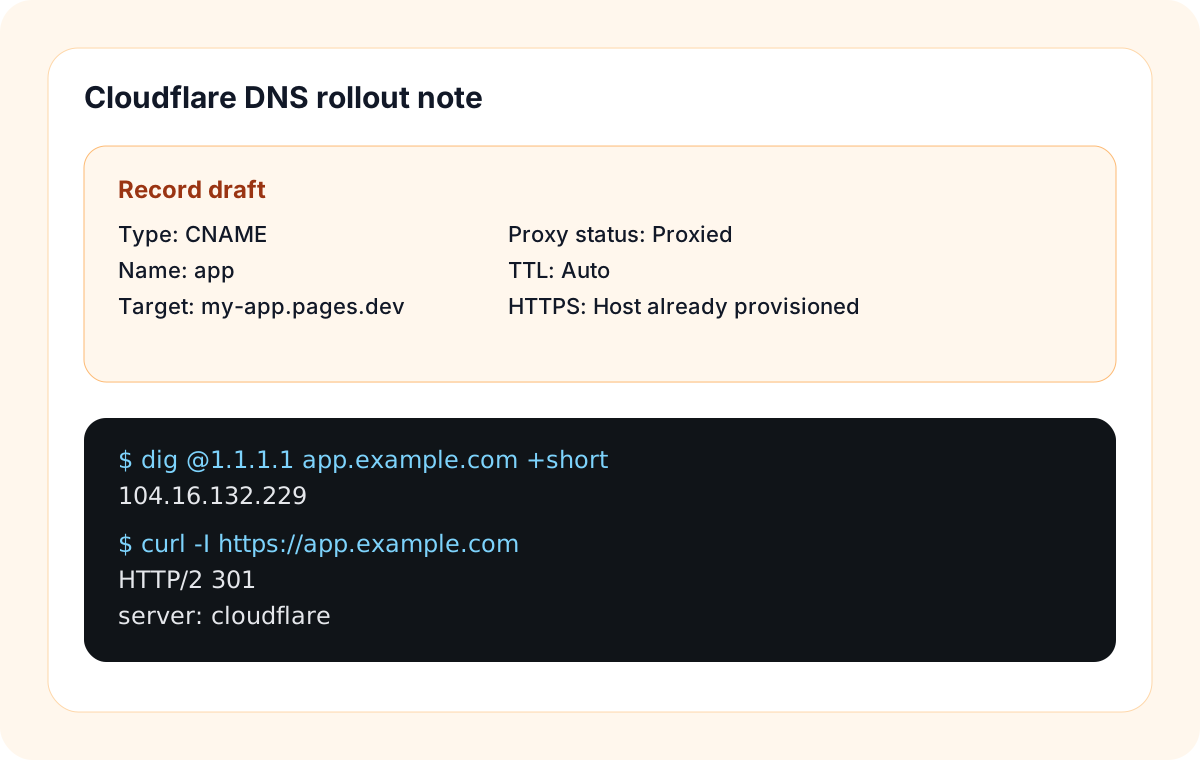
Type: CNAME
Name: app
Target: my-app.pages.dev
Proxy status: Proxied
TTL: Auto
Type: A
Name: api
IPv4 address: 203.0.113.42
Proxy status: DNS only
TTL: 300The record type should follow what the destination vendor or origin actually expects, not what feels cleaner in the dashboard.
2. Choose proxy mode intentionally
Cloudflare gives you two meaningful modes:
- Proxied: traffic reaches Cloudflare first
- DNS only: Cloudflare answers DNS but traffic goes directly to the destination
Use proxied when the service is meant to sit behind Cloudflare’s HTTP edge and you want the request path, certificates, and caching to flow through Cloudflare.
Use DNS only when the destination should be reached directly, the protocol is not appropriate for Cloudflare’s HTTP proxy, or you are isolating an origin issue during debugging.
The important habit is this: do not treat the orange cloud as a default. Treat it as an explicit infrastructure decision.
3. Use a short TTL during rollout
For routine record changes, 300 seconds is a practical manual value. Once the setup is stable, leaving TTL on Auto or moving to a longer interval is usually fine.
During rollout, short TTLs make it easier to recover if the first answer was wrong.
4. Verify Cloudflare’s answer before debugging the app
After saving the record, check what resolvers are seeing:
dig app.example.com
dig +short app.example.com
For a proxied hostname, the answer may resolve to Cloudflare edge IPs rather than your origin directly. That is normal if the record is intentionally proxied.
For a DNS-only hostname, the answer should point straight at the origin target you configured.
If you want a cleaner verification pass, compare Cloudflare’s public resolver with another public resolver:
dig @1.1.1.1 app.example.com
dig @8.8.8.8 app.example.com
For a proxied hostname, the answers will usually be Cloudflare edge IPs. For a DNS-only hostname, they should be the real destination IP or the next alias target you expect.
Field capture
A clean Cloudflare rollout note usually pairs the record settings with one explicit verification pass right after the save.
5. Verify the public request path
Once the DNS answer looks right, test the public hostname itself:
curl -I https://app.example.comWhen the record is proxied and healthy, a first response might look like this:
HTTP/2 301
server: cloudflare
location: https://app.example.com/login
cf-cache-status: DYNAMIC
Then confirm in a browser that:
- the certificate is valid
- the request lands on the correct app
- redirects behave as expected
If DNS looks correct but the wrong app appears, the missing piece is usually host binding or origin routing, not Cloudflare DNS.
A safe Cloudflare workflow in practice
For a standard rollout, this sequence avoids most mistakes:
- choose the hostname
- create the matching record type
- set proxy mode intentionally
- use a short TTL while the rollout is active
- verify DNS output with
dig - verify HTTPS and the actual app response
That sequence is deliberately boring. In practice, boring is what keeps Cloudflare changes understandable.
Common failure cases
The right hostname uses the wrong proxy mode
The record exists, but the platform expected direct DNS or expected traffic behind Cloudflare. The fix is not another random DNS edit. It is understanding what the destination contract actually is.
Cloudflare DNS is correct, but the origin is not ready
The request arrives where it should, but the server or platform does not recognize the hostname yet. That usually shows up as a default site, host-header error, or certificate mismatch.
The dashboard save was never followed by verification
Without dig or a browser check, every later guess becomes slower and noisier.
Quick checklist
Before you call a Cloudflare DNS change complete, confirm:
- the record type matches the destination
- proxy mode was chosen on purpose
- TTL fits the rollout stage
digshows the expected kind of answer- HTTPS is valid for the final hostname
- the browser lands on the correct application
That checklist is small, but it catches the majority of Cloudflare dashboard mistakes before they turn into long debugging sessions.
Manual review
Need a root-domain name reviewed?
and.guide reviews specific root-domain subdomain requests manually. Approval is limited, provisioning is never guaranteed, and honest project context matters more than speed.